Create Detector
The first step is to create a detector. You can create several with different input topics and/or data values.
How-to
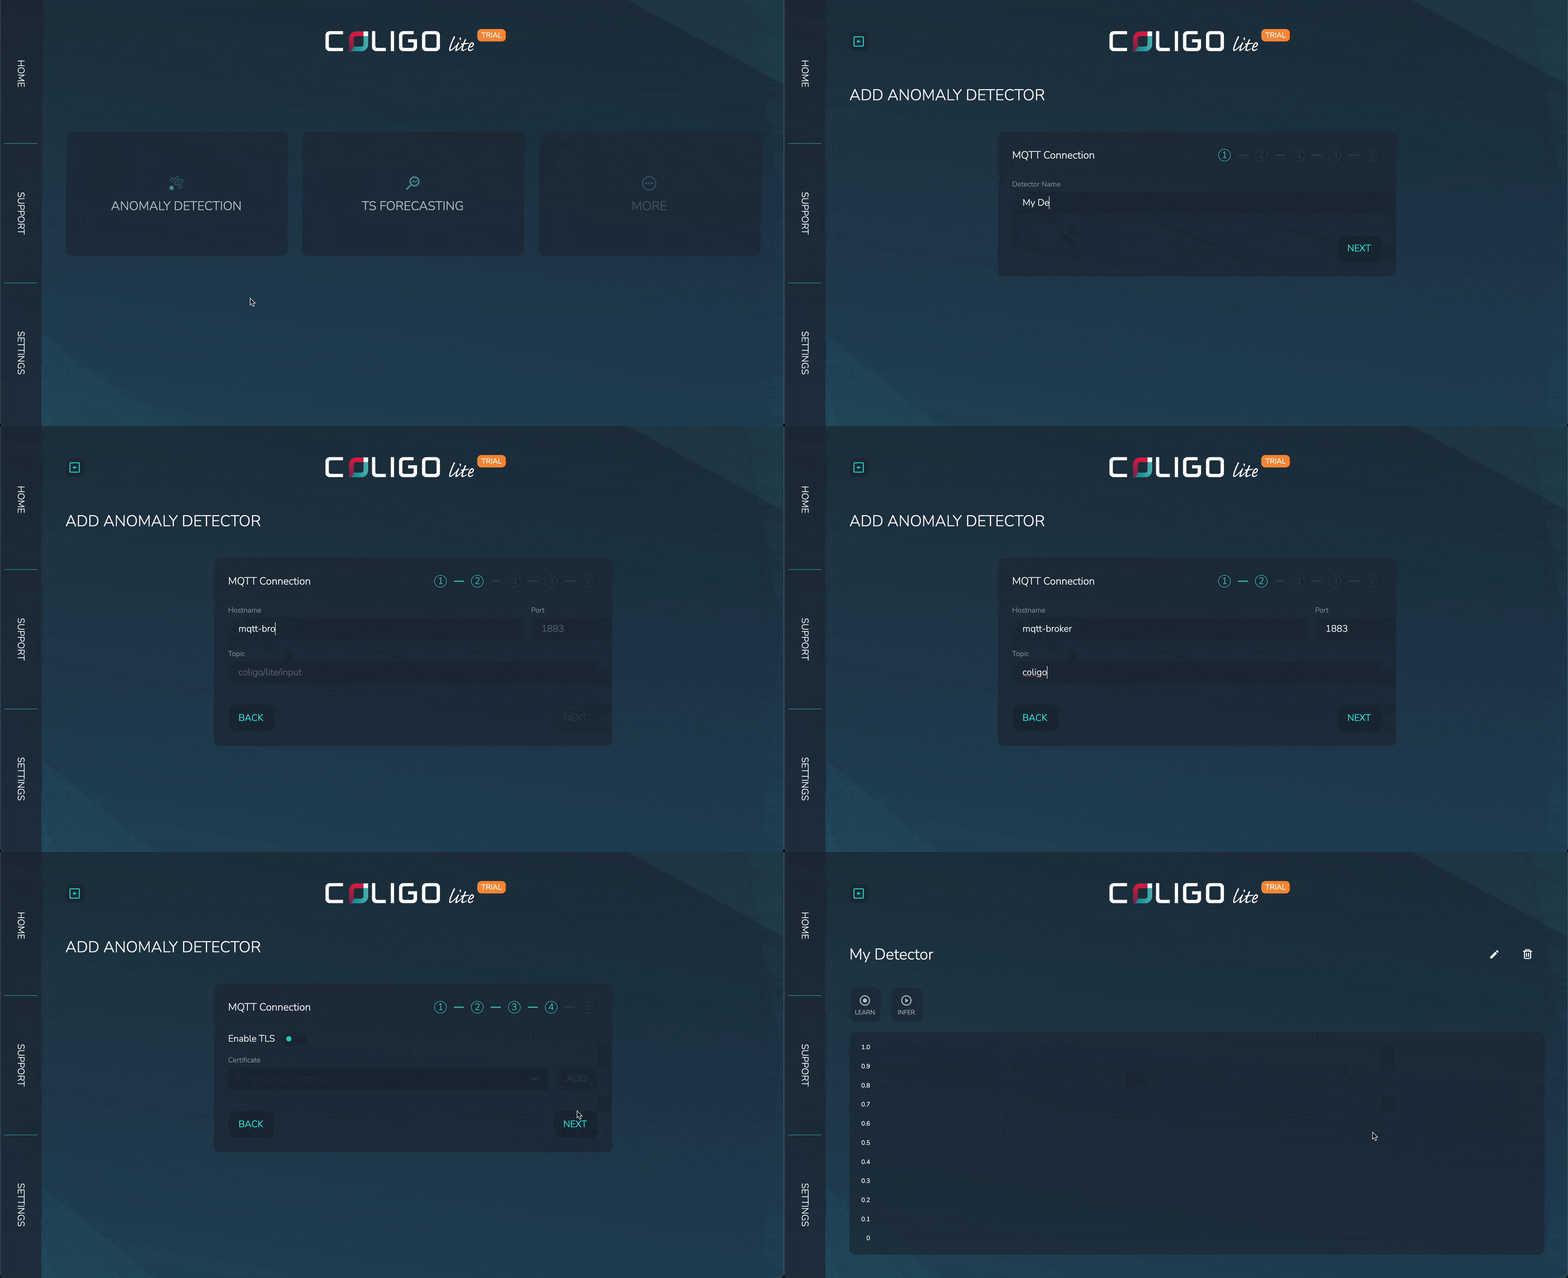
Step-by-step
Enter name
Choose and enter a name for the detector. It does not have to be unique but should be chosen so you can later still distinguish models.
Specify MQTT broker
Enter the hostname or IP address of the MQTT broker you want to connect to. Add the port number the broker is using. Also, set the topic to which the application will subscribe and parse messages.
Optional: Authentication
Add a username and password if it is supported or required for connecting to the broker. This may or may not be necessary depending on the broker configuration.
Optional: Security
If your MQTT broker requires a secure (TLS) connection, you can enforce TLS by providing a .crt certificate file. This ensures that the connection between the detector and the broker is encrypted. Upload or specify the path to the certificate file as needed by your setup.
Define values to use as input
Enter JSON paths for the values you want to use as input for the detector. Since there is no way to check the structure and types of the message payload before subscribing, ensure that:
- The payload of messages on the chosen topic is valid JSON.
- The field types you want to use are numeric.
- You do not use wildcards in your JSON paths, such as
Messages[*]. Use explicit paths instead.
Create
Hit the CREATE button.